First, we started with the underskirt. Normally, when you drape, you only drape the mannequin's right half, since most patterns are symmetrical, which is why you only see half a skirt on the mannequin below. When you look at the photos, you'll notice that there are bits of fabric sticking out here and there -- that's because you leave an excess beyond the seam (which is marked in pencil) which you trim later. The drape of the dress is a far cry from the actual dress.
 underskirt front
 underskirt back
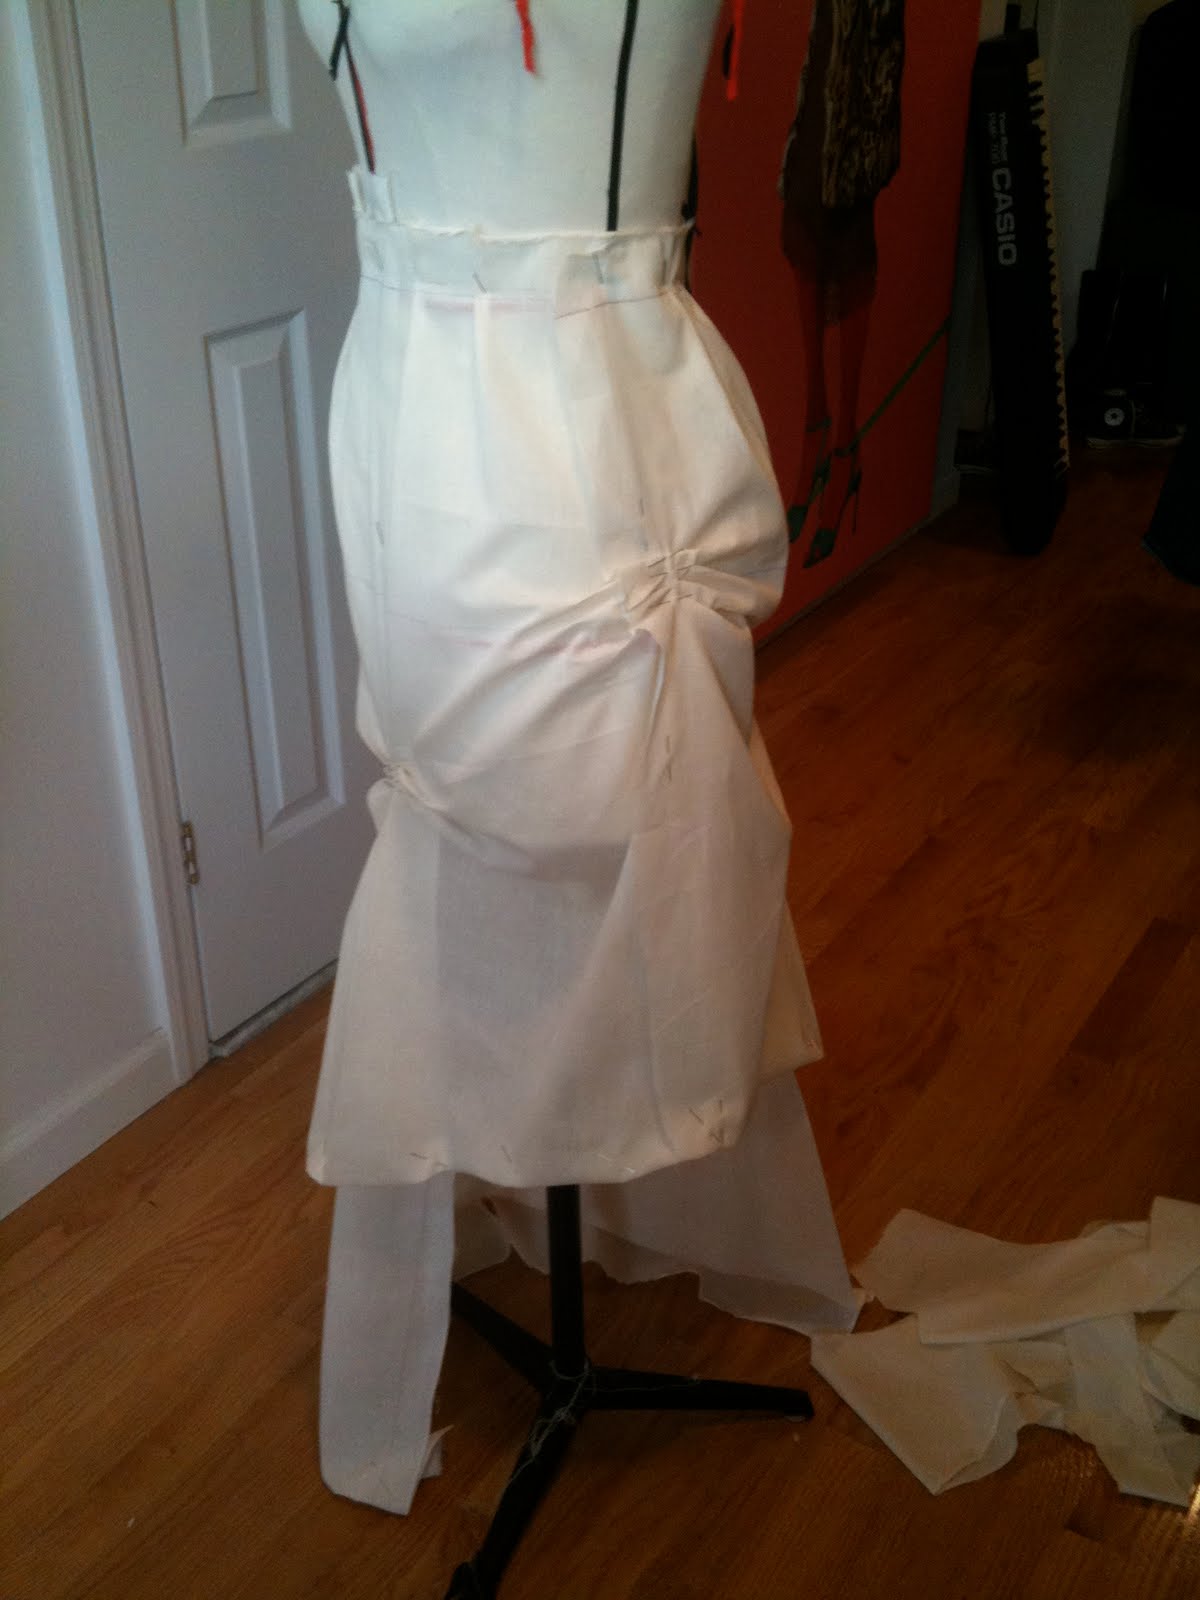
Next I draped the actual skirt of the dress. The underskirt will actually probably be doubled, so one layer of lining, and one layer of organza to give the skirt volume, over which is the actual skirt (which will be attached to the bodice). We had discussed tucks which, I put in the skirt. You can see the underskirt peeking out.


 Next I draped the bodice of the dress. If you recall, Katrin wanted a sheer neckline. It might be difficult to see in this photo, but the bodice is separated along the neckline.
 Finally, I draped an overskirt out of tulle. The color is not the one we'll use (and neither is this fabric, called muslin, the fabric we'll use for the actual dress!) but is good for seeing the sort of effect the tulle will have. She had mentioned she wanted the overskirt to look "accidental" so I draped the overskirt a little messily.

 Now I will submit these photos to Katrin for review before transferring the drape to a paper pattern to make the "muslin," or prototype.
1 comment:
This is awesome to follow!
Post a Comment